I clearly remember the day that I went to go and buy my very first DSLR.
After months and months of saving, opening the box and pulling out it's shiny, perfect, black Canon body, I must have resembled a little girl on Christmas morning. I couldn't have imagined that morning, that less than two years later it would be sitting in its bag at the top of my cupboard; lonely, abandoned and unused for over six months.
A few weeks ago that was the case. Getting overly involved in the hustle and bustle of everyday life meant that I had totally forgotten about my old friend.
But recently all of that has changed, and I'm so looking forward to the fast approaching December holidays to get snapping away!
In the mean time here are a few recent snaps of my furry little monster…
Showing posts with label Photography. Show all posts
Should I take my Point and Shoot or DSLR on holiday?
![]() |
| Source:http://katelynjamesblog.com/dslr-vs-the-point-and-shoot/ |
Going on holiday, something I simply cannot live without is a Camera. But this holiday I found myself in a difficult position, having to chose which of my two loves I would take with me, my Canon S95 Point and Shoot or my Canon D600 DSLR.
To be honest I hadn't really given it much thought, as I felt the Point and Shoot was the obvious option. Not only is my DSLR a lot bigger than my point and shoot, but it's also a lot more expensive especially with a lens attached. So expensive in fact, that it cost more than our whole holiday combined. I knew losing it, or more likely it being stolen, would ruin my holiday and I just didn't want to take the risk.
Enter Mike, my photography teacher, who almost fell of off his chair when I told him I wasn't going to take my DSLR. "Why not!?" He exclaimed in confusion. And pointed out the fact that I bought the camera to take awesome pictures with, so why would I not take it with me going on an awesome overseas adventure, where there would surely be countless awesome photo opportunities?
Lets face it, he made a pretty valid point, so I took it with me instead of the Point and Shoot.
The Bottom Line
DSLR's and Point and Shoots serve very different functions in my opinions, I mean obviously they both take photographs, but it's likely with the proper lens and maybe a flash the DSLR is going to take substantially better photo's. That being said a point and shoot is a lot more practical and easy to carry around.
I don't for a second regret taking my DSLR, it was so much fun to experiment with and take some great quality photos, but I definitely missed the convenience of my point and shoot, especially when I wasn't in the safest of areas.
For me, the next time I go on holiday the choice will be obvious, I'll take both. Like Mike said, "Why have a camera if you're to afraid to use it," but there were times that I just wanted to take a quick snap of something and almost couldn't be bothered to take my big DSLR out of the bag, put the strap around my neck, take the lens cap off, turn the screen around, turn the camera on and adjust the settings.
So there you have it, my two cents, TAKE BOTH!
25 Days till Christmas! What's on your Wish list?
So for now, let's be shallow and talk about the present aspect of Christmas! What's on your list?
Here's my wish list for Santa, I'm going all out just for fun, I mean it's called a wish list right? So its allowed to be impractical, over the top and fun.
As I've gone a little photo obsessed, most of the stuff on this list is camera oriented, sorry if it's a bit boring. But I've tried to add some variety!
Swarovski "Holly Starfish pierced earrings"
I really like the idea of getting at least one Christmas present that you don't need at all. A pure 'want' item that you would never splash the money on for yourself. And this year that lavish and unnecessary gift are these little starfish. I have loved these earrings for as long as I can remember. They are so classic, and go with everything. What's not to love?
My mom's mince pies have got to be the best. But at this point I'd settle for store bought ones. Unfortunately in Korea these little gems are hard-to-come-by (if not impossible)! I didn't even get one last year, hopefully this year i'll have more luck, if not though- definitely next year!
A Pooh Polaroid Camera
This is a totally unnecessary want in my life, but all the "cool" bloggers have one! So I want one too! Plus I think its such a nice idea to take special moment snapshots, put a little magnetic tape on the back and stick them to your fridge.
A Second Memory Card for my Camera
This falls under my reasonable and actually needed category. I would love second memory card for my camera, so that when one is full I don't have to go into panic mode deciding which photos to delete and save. Obviously the bigger the better- but any size will do, I'd just like it to be a "class 10."
A Second Camera Battery
Again a needed and reasonable want, for those days when one battery just isn't enough juice! I believe i need a LP-E8 (who knew)
Body Shop Vitamin E Set
I'v used the body shop's Vitamin E cleanser, toner and moisturizer for years, and I'm totally a fan. Alas, all of mine have run out (pretty much at the same time impressively) and I need some more. I'm categorizing this as necessary pampering. I would replace this myself, but as I'm leaving soon baggage weight is weighing heavily on my mind (see what I did there!). So If someone out there back home wants to treat me to this, you can save on postage:P And I'll pick it up in March!
Very helpful for all of those self portrait pictures of me and Charlie Brown. The canon ones are a little pricey but you can pick up a no-name brand for around 6000won on G-market!
Shutter Releases are used with a tripod to prevent hand shake when taking a picture with a very slow shutter speed. Like everything in life these range from affordable to not so affordable, but you can pick one up easily for around 30 000won.
Camera Tripod
Don't say you didn't see this one coming after you read about the shutter release. I'd really like a tripod with a tilt and adjustable head. I'm loving this one from G-market available for only 20 000won.
So there you have it, pretty geeky hu!? If you're one of the 3 people I may be lucky enough to get a gift from this year, please consult with Charlie Brown (A.K.A Chris) so that I don't get the same gift twice:)
Now I've shared- it's your turn! What's on you're list?
Labels:
Christmas Cool,
Photography,
Things I love
My first studio photo shoot!
This post is way to long, I've posted way to many pictures, but I've cut them down to 10 (ok, maybe 11) from over 1000, and it was hard to chose (not because they were all brilliant or anything, but after a while they all start to look the same.) Give a girl a break! Let me know what you think? To see more photo's from the same shoot go here.
To find out more about the course go here, and to find out more about how to recreate this effect on your own pictures, go here.
Action source credit: davidnanchin
The attraction of Photo Shop "actions": How to install and use a downloaded action
Ultimately an action is a recording of the steps you may have taken, or copied from someone else, while editing a photograph. You can then save that recording and play it over and over again on multiple pictures to get the same style effect.
In this post I'm going to be focusing on how to instal a downloaded action, and apply it to a picture.
Start of by finding an action to download. Deviant Art is always a good place to start, or alternatively just google search "free photoshop actions." I went the google route for this tutorial and found this site here, which offers 100 cool actions for free download.
Chose the action you want, click on it and press download.
Ok, so here is the action I chose from the above mentioned website. Click on the link to open the file.
This should open a page that looks somthing like this. In the top right of the page click "download file. Once the file is downloaded, open photoshop and chose an image you would like the action to be applied to.
This is the image that I chose
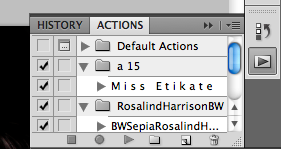
I go to the actions pallet on the right of the screen. If you can't find it go to >window>actions, click on "actions" and a pallet should appear. Or click on the play button which you can see here in the very right of the image, and it will extend the pallet.Now, click on the icon that looks like a downwards pointing triangle with four lines next to it. The following window will pop open, go to "Load Actions" and click on it. Find the place where you saved the action we just downloaded and click on that.

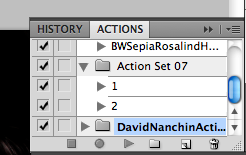
You should now be able to see a file, with the name of the action you downloaded, in your actions menu. Click on the right pointing triangle to extend it so that you can see what's inside the file.

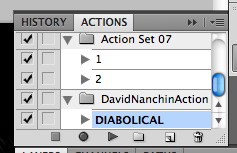
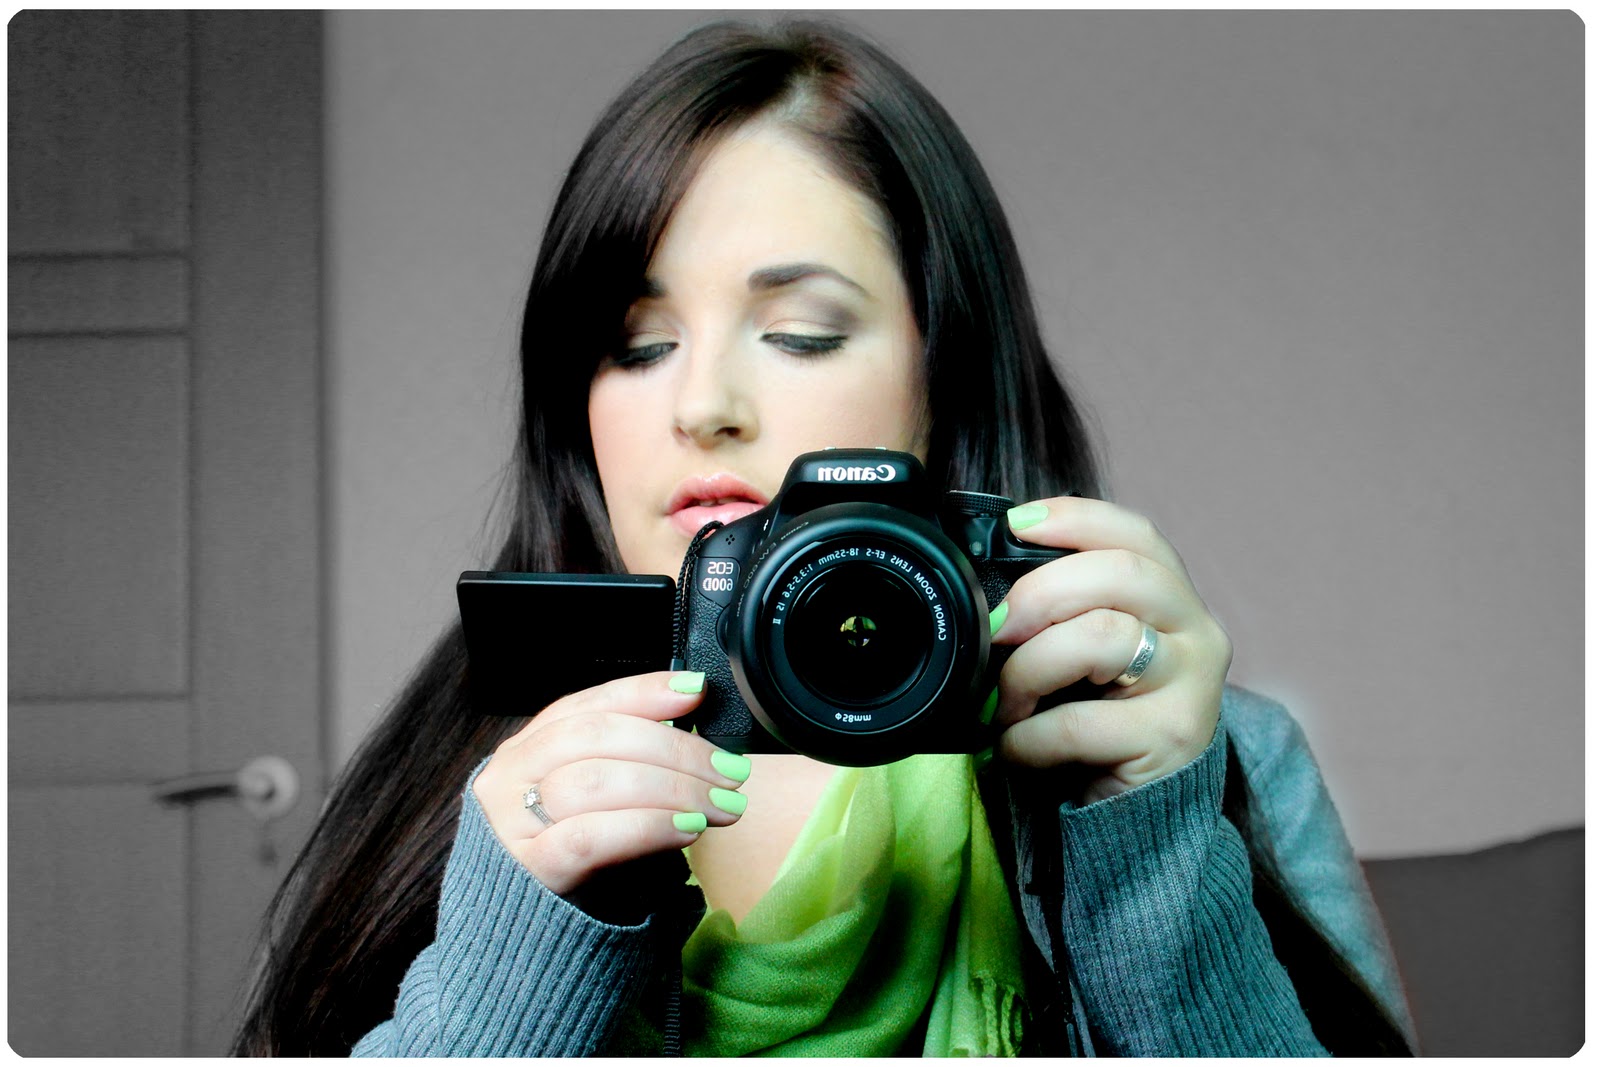
The action I want to use is called "Diabolical" so I select it, and then click the "play arrow" located just below it. It will probably take a few seconds to apply, but soon the image on your screen will have changed to something that looks a little more like this.
So thats it, if you get a little lost along the way, don't hesitate to leave me a comment or send me an email:)
Action source credit: davidnanchin
Back to basics! ISO, Aperture and Shutter Speed
A while ago I told you about a photography course I had signed up for, (if you missed the post you can go and read about it here) the course started this past Sunday and I thought I'd give you a brief overview of some of the things I learnt. Hopefully in writing this we can learn together, and it will clarify and cement some of the things I learnt in 6 hours of information overload!
Ok so here's a rough overview of some theory.
Amongst a whole bunch of other stuff, taking a photo is about finding a balance between three things, ISO, Aperture and Shutter speed, the relationship between these three things and how they work is called exposure. Any change in one of the above three elements will have a specific effect to how the two unchanged elements are affected in creating the photograph.
What are ISO, Aperture and Shutter speed you ask? Well this is my understanding of them...
ISO: Basically the ISO is how light sensitive the camera is. The higher the ISO number, the more sensitive the image sensor in your digital camera is, or the more sensitive your film is to light in a film camera.
In professional studio shoots where a room is full of light, you can use a low ISO of 100, the lower your ISO is the better quality your film will be.Where as in a low light situation, for example an indoors sport event, where you want to capture someone in action, increase you ISO to about 800 (or more), doing this will also increase your shutter speed ability so you can capture clear movement.
Tip: In situations where you can't use a flash like a museum, concert or church, increase your ISO.
*It's important to take note that the higher your ISO is, the more susceptible the photograph is to looking grainy.
Aperture: Aperture can be slightly confusing at times, so bear with me for a moment. To put it simply, aperture is how wide the hole at the back of your lens opens to let light in. Aperture is measured in f-stops. An f-stop of say, 1.4 will let a huge amount of light in (the hole will be as big as it can possibly go) where as an F-stop of 22 will let a small amount of light in as the hole at the back of the lens is about as big as a pin hole.
The smaller the f-number (for example f-2), the larger the diameter of the hole, and therefore the shallower the depth of field. Small f-numbers are great for close-up profile pictures, because only the face will be in focus, everything outside of the face will be out of focus, which creates a really great effect.
The higher the f-number( say f-22), the smaller the diameter of the opening and the greater the depth of field. High f-numbers are great when you're trying to take a landscape photograph and you want everything to be in focus, not just one aspect of the picture.
*So here's the part that gets a bit confusing a small f-number of say f-2 is called a LARGE aperture, where a large f-number of say f-22 is called a SMALL aperture. I guess that it's logical to think that a lower number would be called small, and a higher number would be called large, but because the hole at the back of the lens is its widest when the f-number is its lowest we call small f-numbers large apertures.
Shutter speed: This term is pretty self explanatory. Shutter speed is the speed of the shutter on your camera. Shutter speed is measured in fractions of a second, and measures the amount of time the shutter is open for, each time you take a photograph.
Shutter speed can change the way that movement appears on a camera. Extremely fast/short shutter-speeds can freeze fast moving subjects, for example a propeller on a helicopter making it look like the helicopter is floating in the air (making it look unnaturally frozen). Alternatively slow/short shutter speeds can be used to intentionally create a blur in the picture, this way the propeller on the helicopter will not be clear and frozen in time, but rather blurry, indicating that the helicopter is moving.
The slower the shutter speed is the easier it is to create unwanted movement with hand shake, if your shutter speed is very low, use a tripod or stable foundation to prevent unwanted blur.
Tip: For anything slower than 1/60th of a second use a tripod to prevent hand shake
So there you have it, some basic theory on exposure, I hope this all made sense and wasn't too confusing. Like I said I'm just starting out myself, but if there's anything you're confused about send me an email to thebinkibox@gmail.com or leave me a comment and I'll do my best to help.

Ok so here's a rough overview of some theory.
Amongst a whole bunch of other stuff, taking a photo is about finding a balance between three things, ISO, Aperture and Shutter speed, the relationship between these three things and how they work is called exposure. Any change in one of the above three elements will have a specific effect to how the two unchanged elements are affected in creating the photograph.
![]() |
| The exposure triangle; a balance between ISO, aperture and shutter speed. Source: http://www.exposureguide.com/exposure.htm |
ISO: Basically the ISO is how light sensitive the camera is. The higher the ISO number, the more sensitive the image sensor in your digital camera is, or the more sensitive your film is to light in a film camera.
In professional studio shoots where a room is full of light, you can use a low ISO of 100, the lower your ISO is the better quality your film will be.Where as in a low light situation, for example an indoors sport event, where you want to capture someone in action, increase you ISO to about 800 (or more), doing this will also increase your shutter speed ability so you can capture clear movement.
Tip: In situations where you can't use a flash like a museum, concert or church, increase your ISO.
*It's important to take note that the higher your ISO is, the more susceptible the photograph is to looking grainy.
| ISO comparison; notice how the image in the top left of the frame with an ISO of 100 is a lot sharper and clearer than the image in the bottom right frame with an ISO of 3200. For a magnified look go here. Image source:http://consumerelectronicsnet.com |
The smaller the f-number (for example f-2), the larger the diameter of the hole, and therefore the shallower the depth of field. Small f-numbers are great for close-up profile pictures, because only the face will be in focus, everything outside of the face will be out of focus, which creates a really great effect.
The higher the f-number( say f-22), the smaller the diameter of the opening and the greater the depth of field. High f-numbers are great when you're trying to take a landscape photograph and you want everything to be in focus, not just one aspect of the picture.
*So here's the part that gets a bit confusing a small f-number of say f-2 is called a LARGE aperture, where a large f-number of say f-22 is called a SMALL aperture. I guess that it's logical to think that a lower number would be called small, and a higher number would be called large, but because the hole at the back of the lens is its widest when the f-number is its lowest we call small f-numbers large apertures.
![]() |
| The first picture was taken using a large aperture, hence the narrow depth of field, resulting in only the daisy being in focus. In the second picture a smaller aperture is used, increasing the depth of field and increasing the amount in focus in the picture. Source: http://www.photographyreal.com |
Shutter speed: This term is pretty self explanatory. Shutter speed is the speed of the shutter on your camera. Shutter speed is measured in fractions of a second, and measures the amount of time the shutter is open for, each time you take a photograph.
Shutter speed can change the way that movement appears on a camera. Extremely fast/short shutter-speeds can freeze fast moving subjects, for example a propeller on a helicopter making it look like the helicopter is floating in the air (making it look unnaturally frozen). Alternatively slow/short shutter speeds can be used to intentionally create a blur in the picture, this way the propeller on the helicopter will not be clear and frozen in time, but rather blurry, indicating that the helicopter is moving.
The slower the shutter speed is the easier it is to create unwanted movement with hand shake, if your shutter speed is very low, use a tripod or stable foundation to prevent unwanted blur.
Tip: For anything slower than 1/60th of a second use a tripod to prevent hand shake
![]() |
| The picture on the right is using a fast shutter speed, so we see a sort of frozen snapshot of the water. The picture on the right was taken with a much slower shutter speed and indicates the movement of the flowing water. Source: http://shabbyblogsblog.blogspot.com |
Photography course in Seoul: My exciting news
At the moment the beginners course consists of 4 classes, which take place every Sunday for the month you sign up for. The classes are each 3 hours long, and cost 200 000won in total. But if you sign up in advance there is an 'Early Bird" discount.
I'm feeling very excited about it and can't wait to start!
For more information on this and other photography courses offered at Studio 11 go here, and/or if you feel like doing the beginners course with me this November send me an email to thebinkibox@gmail.com
Getting that Retro Film look
This tutorial is intended for photoshop CS5
Time required: 10min
Level: Basic/beginner
The potential of things one can achieve in photoshop seems to me to be only limited by one's imagination. However, for first time users, Photoshop can be an extremely daunting interface. In this tutorial we will transform an ordinary looking photo into something a little more funky and retro.
Tip: This effect will work best with high contrast outdoor photos
Step 1:
Open Adobe Photoshop, go to File>Open> and select an image you want to try this effect on.
Step 2:
On the right hand side of Photoshop you should see a layers panel (if you can't see it it, go to the top of the page click on Window>layers, and the panel should pop up). In the layers panel you should be able to see a small thumbnail of your picture with the label "background" and a small icon of a lock. This icon means that the layer is locked. In order to work on the layer we need to unlock the icon, to do this double click on the layer "background".A new panel pops up titled New layer, next to "name:" type in "retro" and click "ok."
Step 3:
Go back to the layers panel and right click on the "retro layer," select "blending options" from the pop up menu. A new panel titled "layer styles" opens. On the left of the panel select "color overlay."
Once you have selected "color overlay" change the blend mode to "exclusion" and drop the opacity to about 25%.
Next to the "blend mode" you will see a box filed with a color, by clicking on the color a new panel will pop up and you can select any color you want to achieve the effect your looking for. I think turquoise #0ceef1 works well with this look.
Once your satisfied with the look of your picture, click "ok" and "ok" again.
Step 4:
Go back to your layers panel again and right click on the "retro" layer, select "Convert to Smart Object"
Step 5:Go to Filter>Lens Correction, a window will pop up. On the right next to "Auto Correction" select the "Custom" tab.
Under the "Custom" tab go to "Vignette" and adjust the "amount" to approximately -60 or whatever you prefer.
Click "ok" once you're happy with the result.
Now all you need to do is save you're work and your done!
Subscribe to:
Posts (Atom)